Show stopper. Slow cooked. Sticky. Juicy. Smoky. Delicious. Almost no effort at all. Just a little patience. Well worth the wait.
Servings: 2-3 people, up to 4 people if served pulled in sliders.
Prep time: 10 mins
Marinating time: 0 mins – 24 hours (overnight ideally)
Cooking times: 3.5 hours – 5 hours according to your preference; 5-10 mins; the glazing of the ribs under your grill.
Ingredients:
For the meat:
- 1.5 kg rack of beef short ribs with inner lining removed (for pork ribs version see notes section below)
- smoked salt (you can use normal salt if you don’t have) and pepper
- 3 tablespoons American mustard
- 2 tablespoons brown sugar
- optional: 1 tablespoon liquid smoke
- 3-4 tablespoons Homemade Dry Rub*
- 1 cup of coke (trust me)
- 1 bottle of milk stout, 250 ml (you can use any type of stout or even your dad’s beer in the fridge)
- 1/2 cup of Homemade BBQ glaze**
For the Homemade BBQ dry rub* (can be stored in a mason jar for ages):
- 2 tablespoons smoked paprika
- 2 tablespoons garlic powder
- 2 tablespoons onion powder
- 1 tablespoon chilli powder
- 1 tablespoon mustard seeds
- 1 tablespoon cayenne pepper
For the Homemade BBQ glaze** (can be stored in a airtight container in the fridge for up to 2 weeks):
- 1 bottle of your favourite BBQ sauce
- 2-3 tablespoons of honey
- 1/4 of a cup of brown sugar
- 3 shots of cheap whiskey
- optional: liquid smoke
Method
Stage 1: Making the dry rub
- Combine all the ingredients listed above in a mason jar and mix well. Congratulations, you have just made the super complex dry rub. This can be stored for eternity (ok maybe not eternity) until it’s used up.
Stage 2: Preparing the meat
- If your butcher has not done so, remove the lining/film covering the back of the ribs by just peeling it off. If this is too difficult for you, don’t worry, just pierce it with a knife in between each rib segment and it should peel off during the cooking. Pat the meat dry using kitchen towel.
- Paint the meat with the mustard (and if using the liquid smoke) and then season generously with salt and pepper. Sprinkle over the dry rub and brown sugar and massage into the meat. Optional: For best results, cover and leave in the fridge overnight (or at least for a few hours).
- If your ribs were marinating in the fridge, take them out to relax and get to room temperature.
- Put your oven on its highest setting, (fan forced).
- Place the ribs into a large roasting dish. Add the stout and and coke around and beneath the ribs.
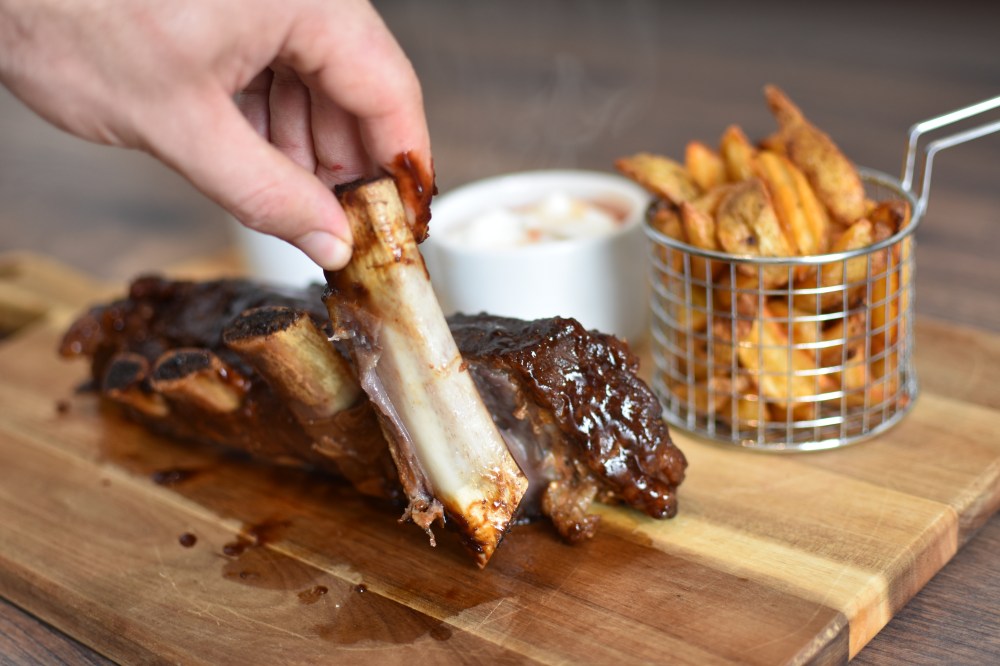
- Cover the whole dish tightly with aluminium foil and transfer to the oven. Turn the temperature down to 120 degrees Celsius immediately and cook using the following guide: (3.5 hours if you want tender ribs, but still have enough bite to need a knife and fork, 4 hours to have very tender ribs with only a little of resistance, and 5 hours to have pull apart consistency ribs for use on sliders 🍔.
- Take the meat out of the oven and and give them a prod to check consistency. If you want them softer, cover and cook for longer, checking at 15 min intervals. Otherwise, leave covered while you make the glaze.
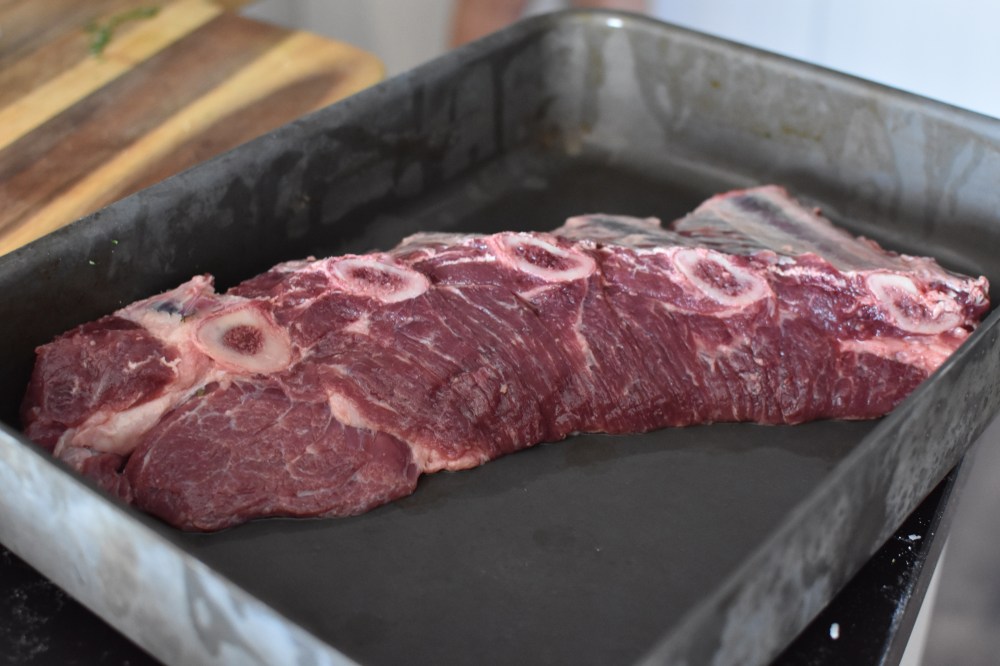
Beef ribs with lining removed 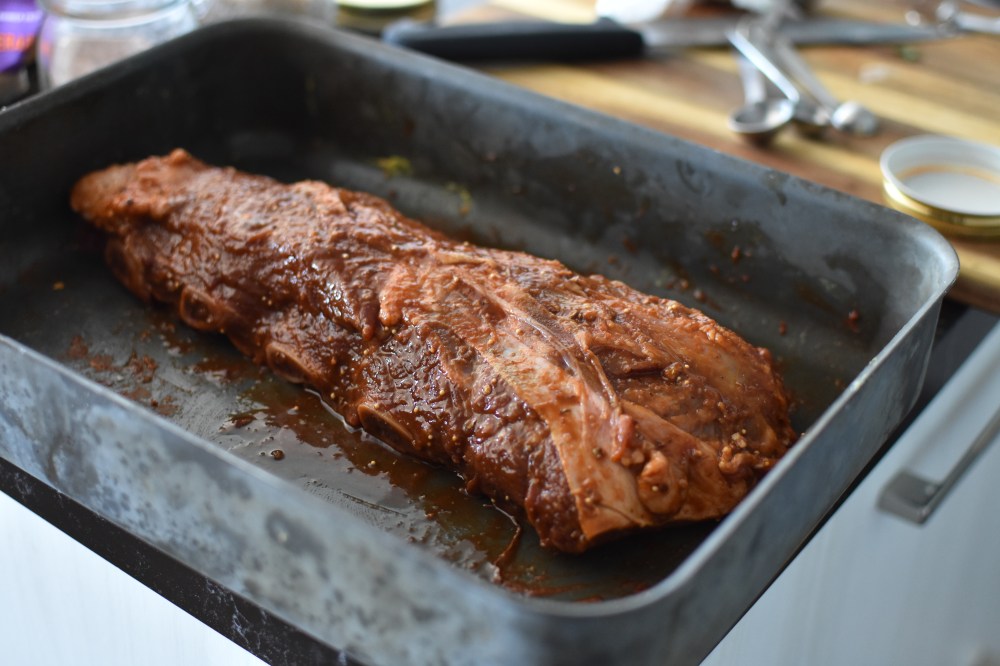
Marinating the meat
Stage 3: Making the glaze and glazing the meat.
- Dump 1 bottle of your favourite BBQ sauce in a saucepan together with 2 shots of cheap whiskey, 2-3 tablespoons of honey and 1/4 cup of brown sugar and cook over a medium-high heat stirring frequently until thickened – should take about 10 minutes. Then take off the heat and stir the last shot of whiskey.
- Switch on your grill to maximum.
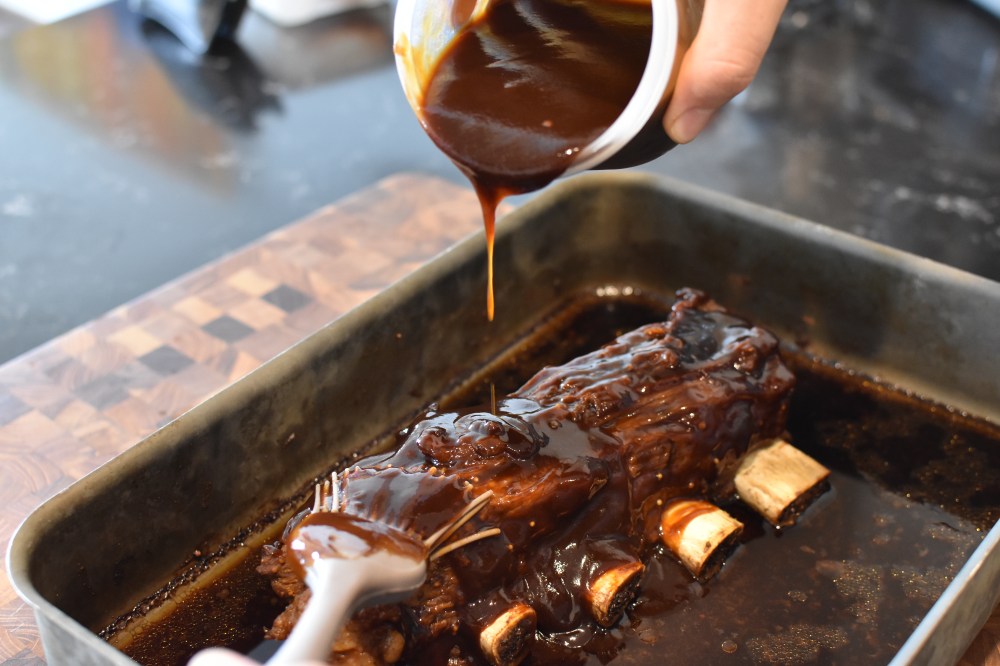
- Uncover and base the beef with its own juices and then the glaze.
- Cook under the grill for a few minutes until the glaze starts to caramelise and bubble.
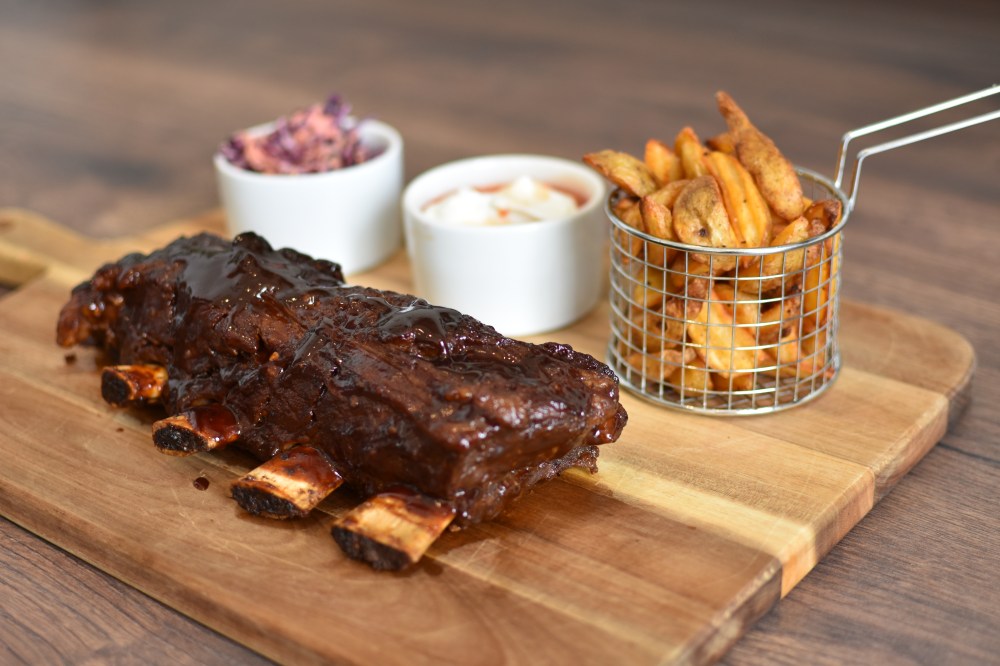
- Take out the ribs and serve with extra glaze if so desired, together with sides of your choice.
Notes:
This recipe can be easily adapted for pork ribs. I suggest reducing the cooking time to around 3 hours, then checking for your preferred consistency. Also I would opt for cider in place of the stout.
The glaze can also be made ahead of time and stored in a sealed container. It should keep well in the fridge and can also be used for other recipes such a BBQ chicken wings.
If you want to make these ribs for outdoor BBQ, feel free to follow all the steps minus the glazing part. Then wrap your oven baked ribs in foil and take the glaze with you in a container. Finish them off over the bbq flames basing them with the glaze as you go. In this case I suggest to restrain from cooking them for more than 4.5 hours as it’ll be nigh impossible to move them on the BBQ without them falling apart cause they just be too tender!
As for sides, I tend to enjoy this with some slaw and wedges, as below. You can find my own version of healthy coleslaw and wedges dipping sauce in the sides section. If you opt for the slider version, top some lightly toasted brioche buns with mature cheddar cheese, sliced gherkins, mustard, some of the BBQ glaze and generous helpings of your delicious beef of course!